PIR Sensor
Overview
This page describes how to use a PIR sensor for intelligent motion detection and automatic snapshots with the NE100-MB01 Vision AI camera, enabling a low-power solution for security and smart home applications.
PIR Features
PIR sensor are commonly used in security and automation systems to detect movement by sensing infrared (heat) radiation emitted by objects. Key features include:
- Detection Distance:3–7 meters (depending on the specific model)
- Detection Angle:Horizontal 110° × Vertical 90° wide coverage
- Power Supply: Operates over a wide voltage range of 3.3V–5V
- Low Power Consumption:Ultra-low standby current in the microampere (μA) range makes them highly energy-efficient.
Preparation
Hardware
- NE100-MB01 Dev Board
- PIR Sensor
Software
1. Firmware
- Download pre-compiled firmware for use:lowpower_camera/bin/NE_101_PIR.zip
2. Environment Requirements
- IDE Software:Visual Studio Code(v1.99.2+)
- Development Framework:ESP-IDF Extension(v5.1.6)
- Example Repository: lowpower_camera
Getting Start
Using Precompiled Firmware
1. Hardware Connection
- Connect the PIR sensor to the development board
- Ensure stable power supply
For More details please refer to the Hardware Connection Guide
2. Firmware flashing
Refer to the below to flash the firmware: the System Flashing and Initialization Guide
3. PIR Function Verification
- Power on the device and complete initialization
- Enter low-power standby mode
- Trigger the PIR sensor:
- Observe the status indicator LED response
- Verify automatic snapshot and upload functionality
Refer to the complete testing procedure in: Quick Start Guide
Using Source Code Development
1. Clone the repository using the following command
git clone https://github.com/camthink-ai/lowpower_camera.git
2. Project setup
Open the directory in VS Code:

3. Configuration
- GPIO Setting:
- Use RTC GPIO to support wake-up PIR functionality
- Avoid interference from external pull-up resistors

- Sensitivity Adjustment:
- Adjust detection parameters according to the application scenario

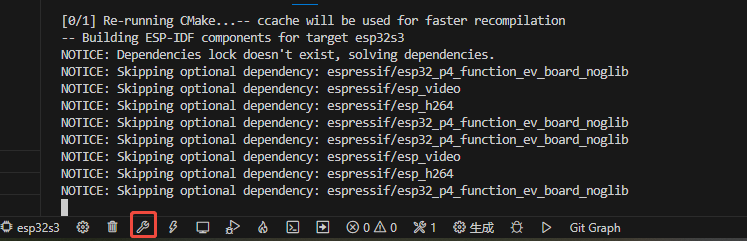
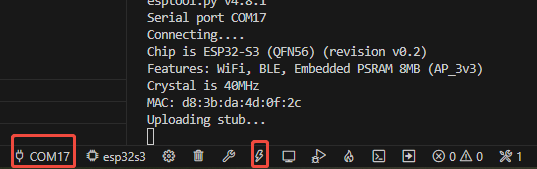
4. Compile and deploy the source code
- Select esp32s3 as the target chip:

- Select the build button to compile the source code:
- Select the flash button to upload the generated firmware to the device:
5. PIR Function Verification
Same with using precompiled firmware
Suggestions
Anti-Interference
- Increase
PULSE_CValue( 2–3 seconds) - Keep away from motors or inverters
Environment
- Install at 1.5–2 meters height
- Avoid direct sunlight on the sensor
- Clean the sensor lens regularly
- Adjust detection angle for the scene
Debug Tips::
- Use a logic analyzer to check GPIO signals
- Check serial logs to find false trigger reasons